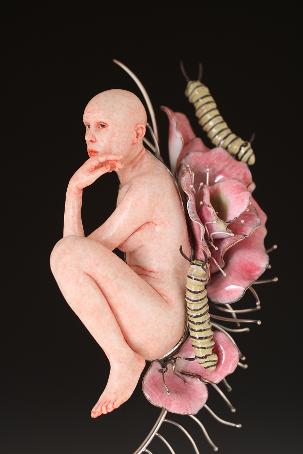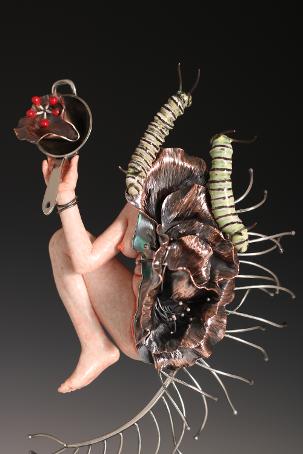


The enamel on these pieces was applied using an airbrush (spraying 3:1 parts Klyr-fire to distilled water) and 100 mesh sifters. Spray then sift, spray then sift... until the object is evenly coated.
I used two thin coats of opaque Thompson Melon on the caterpillars fired to 1450 and black Sunshine painting enamel 1435 for the lines. Too much enamel (Melon) will cause thin areas to pull from thinner areas. Too thick application of painting enamel will cause the paint to crack. Allow the paint to dry, then scratch around areas to clean them up (or use just the medium and a brush along the dried edges). The caterpillars were ectroformed from wax duplicates I made using the Micro-sculpting technique.
For the petals, I applied a white base coat 1030, then transparent Pink, Geranium, and Rose in different layers. I used an X-acto blade to sgraffito lines into the sifted enamel for a textured appearance. The layers produced a heavier application, but had the desired effect.
Enameled sections of these pieces are held to pieces with micro-fasteners. For the caterpillars, bolts are soldered directly to the metal before enameling. Enamel is sifted over the object, then cleaned with a brush to keep bolts enamel free. The petals have multiple holes drilled into sections for cold connections. These areas are held together with nuts and bolts, or tapped.

Notes: Nurture Series
I'm experimenting with a technique Keith Lewis demonstrated at the Enamelist Conference 2022. These pieces use 22K gold leaf over a base coat of opaque cobalt blue. I use needle tools to scratch through the leaf to produce a drawing with delicate lines, and different tools create a variety of marks. A small glass brush will remove the excess gold leaf in the negative space. This technique is predictable and has good results. The only issue can be small air pockets trapped under the leaf. I scratch through most areas to prevent this. Once the leaf is glued to the enamel, you can spend several days working on the drawing. No need to rush the fusing.


This piece was created using porcelain, fine silver, cloisonné wire, and Thompson enamels. I etched a lovely skeleton under the enamel but had some issues with the fire polish.
Note: fine silver etches faster than sterling or copper. (10 min
Note: it is better to fire polish something from the back side. Place the piece up against a fire brick at an angle and heat with a fluffy torch. The front will be cleaner and more luminous.
The sea green color in the negative space is definitely one of my favorites, and mixing the opaque white with the translucent colors was very effective in the pelvic region.
Also, having a blast with my new Cricut. Thank you Harlan Butt for your fabulous workshop at Arrowmont, and the Enamelist Society Conference was truly amazing. Also, thank you to Keith Lewis and his incredible gold leaf technique.
Cant' wait until Little Rock.